iOS Request Stores Access
Step 1: Create App Identifiers
Create New App IDs Core
-
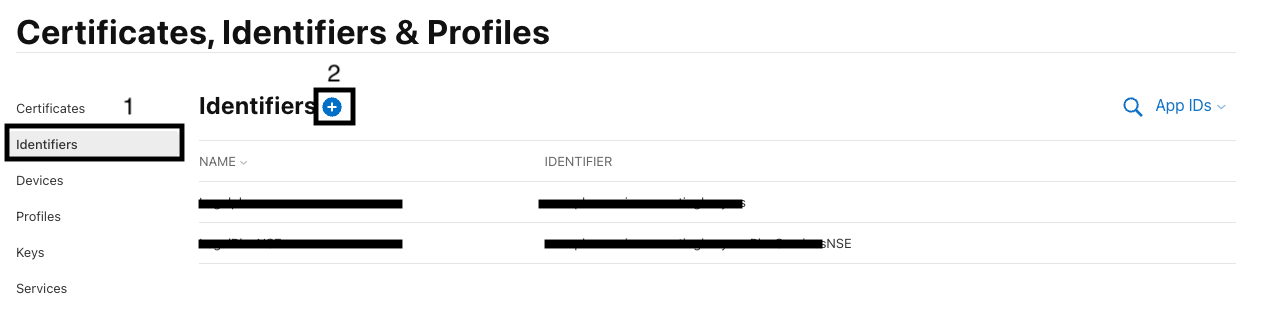
Go to Apple Developer Identifiers Page
- Visit Apple Developer Identifiers.
- Press on "Identifiers" and click on the add button (+) to create two new app identifiers.
-
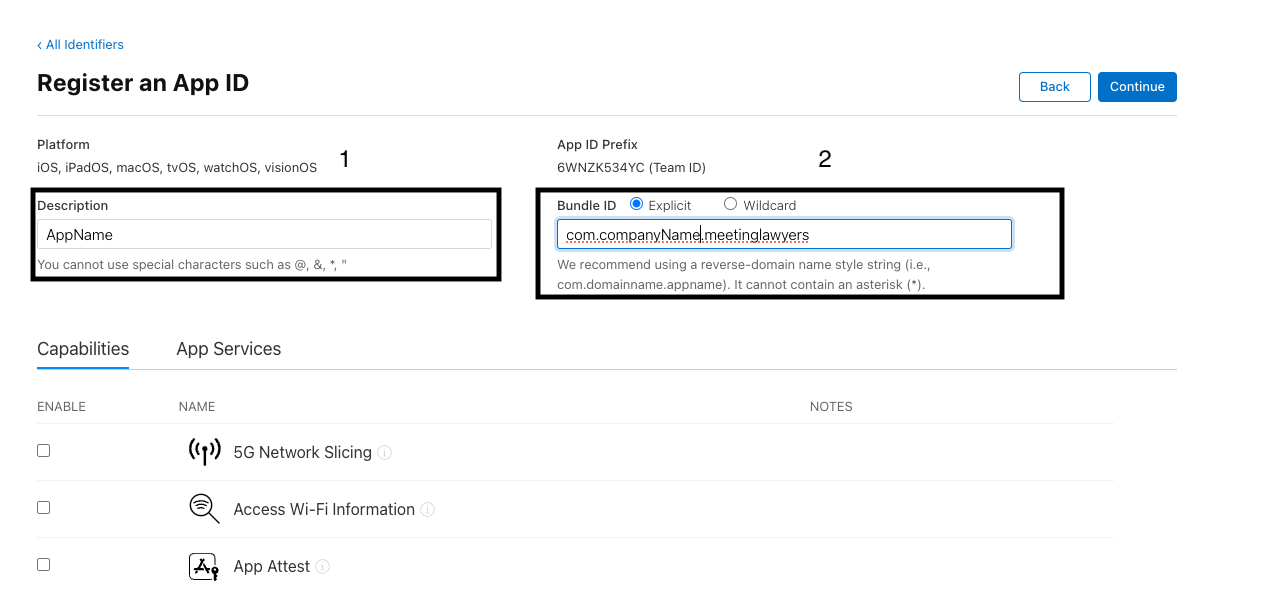
First App ID (Core App)
- Identifier:
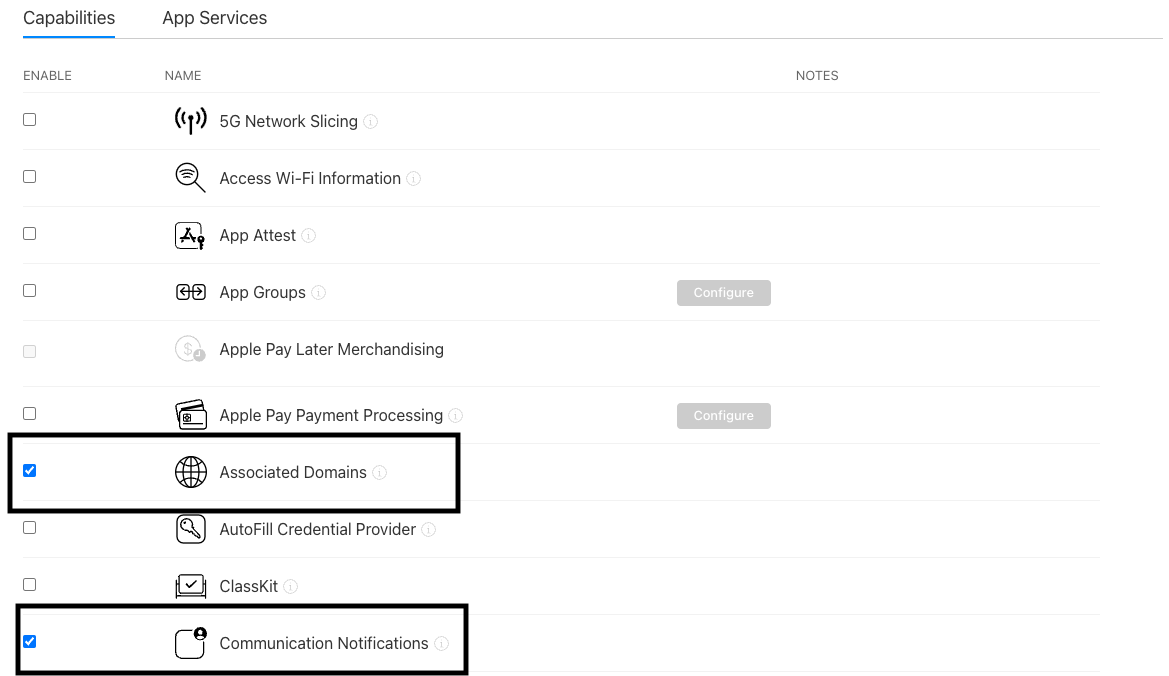
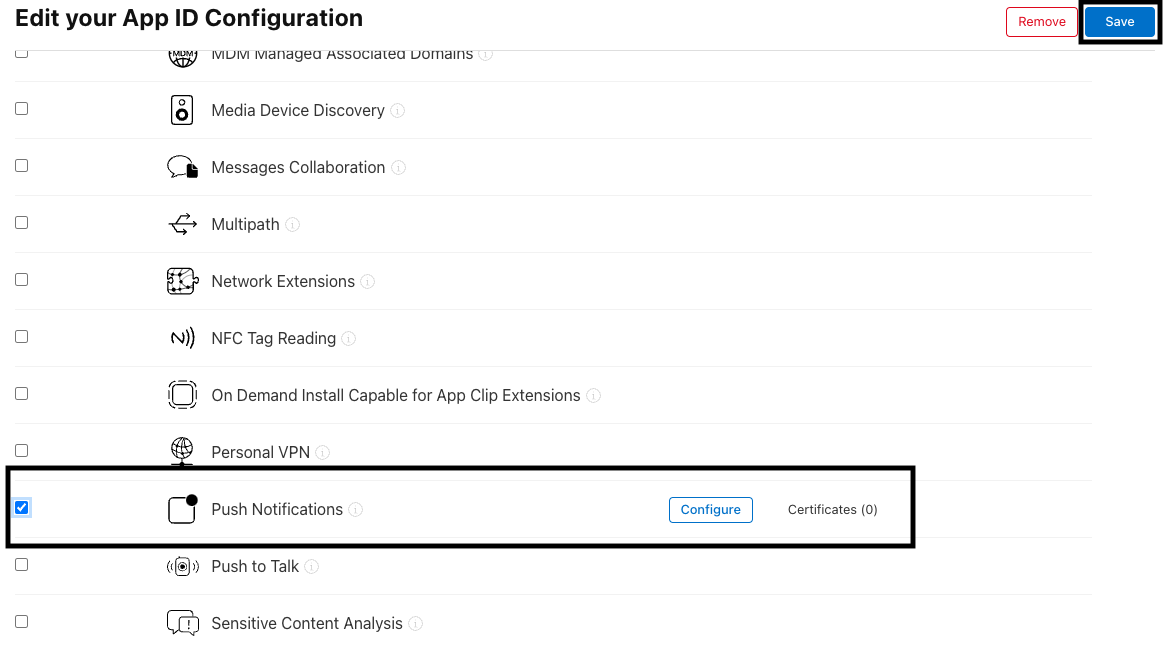
com.companyname.meetinglawyers - Capabilities:
- Associated Domains
- Communication Notifications
- Push Notifications

- Identifier:
Create New App IDs For NSE
-
Go to Apple Developer Identifiers Page
- Visit Apple Developer Identifiers.
- Press on "Identifiers" and click on the add button (+) to create two new app identifiers.
-
Second App ID (Push Notifications)
- Identifier:
com.companyname.meetinglawyers.companynameNSE - No capabilities need to be checked.
- Identifier:
Step 2: Grant Permissions
-
Go to App Store Connect
- Visit App Store Connect.
-
Navigate to Users and Access
- Click on "Users and Access".
- Click on the add button (+).
-
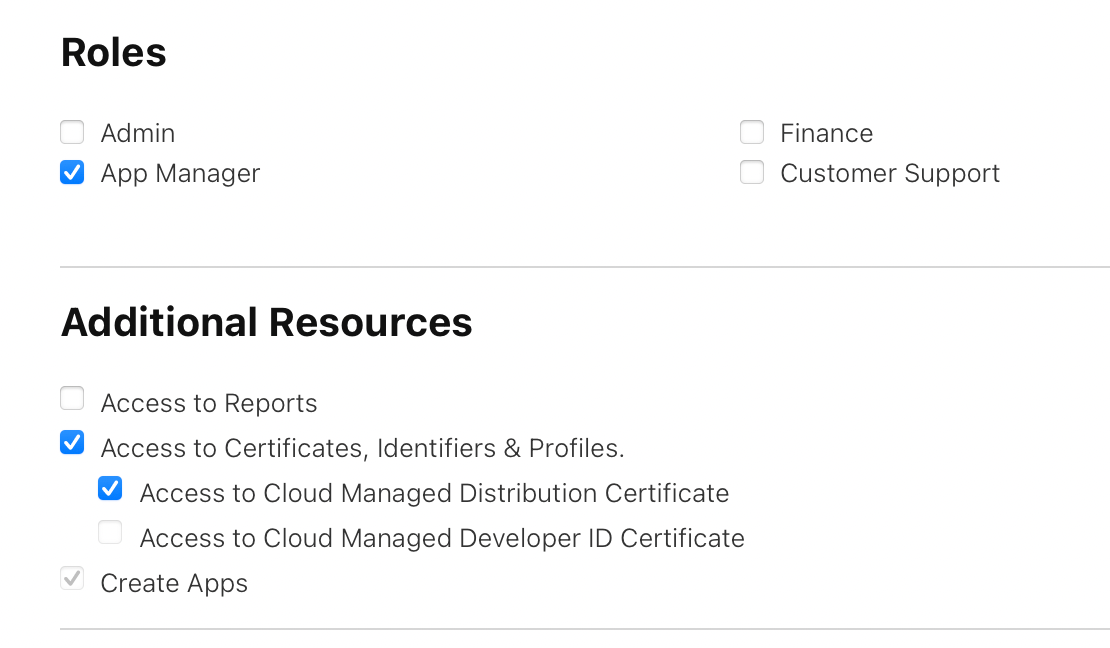
Provide Permissions
- Email:
accounts@meetinglawyers.com - Roles:
App Manager - Additional Resources:
- “Access to Certificates, Identifiers & Profiles.”
- “Access to Cloud Managed Distribution Certificate”
- “Create apps” (only if you want us to create the app)
- Email:
caution
If you do not want to grant us permissions to publish directly in the stores, you can give us the "Developer" role instead of "App Manager". However, please note that this will require you to:
- Create and send us all the certificates and provisioning profiles (see what we need and how to generate them).
- Fill out all the app details, including screenshots, and keep this information updated.
- Handle the submission of each app version to the store and ensure everything is updated accordingly.
Conclusion
By following these steps, you will successfully create new app identifiers and grant the necessary permissions to manage the app. This setup ensures that the app can be managed efficiently and published on the Apple Store.
For further details and support, visit the Apple Developer Support.